

Key Takeaways
Why Walk-In Showers Work Well for Older Homeowners
A walk-in shower is exactly what it sounds like: a shower enclosure you step directly into, usually with a low or zero-threshold entry — meaning little to no curb or lip to step over. For homeowners managing reduced mobility, joint pain, or balance concerns, this design removes one of the most common bathroom hazards: the act of stepping in and out of a conventional tub.
Beyond safety, walk-in showers tend to feel more spacious, are easier to clean than tub-shower combos, and can be styled to suit nearly any bathroom aesthetic. If you're also weighing whether a walk-in tub might be a better fit for your situation, our overview of walk-in tubs and aging in place explains the differences clearly.
For a broader look at bathroom planning with safety as the priority, the accessible bathrooms hub covers layout, features, and renovation considerations in depth.
Planning Your Design: Key Decisions to Make First
Before a contractor sets foot in your bathroom, it helps to have a working sense of what you want. The main design decisions that affect both cost and functionality include:
- Size and footprint: A minimum of 36×36 inches is standard, but a 36×60 inch or larger footprint is far more comfortable and better suited to accessibility needs. Confirm what your existing bathroom can accommodate.
- Entry width: Standard doorways are often 24–28 inches wide, but an accessible entry should be at least 32–36 inches to allow for walkers or wheelchairs if needed.
- Door vs. doorless: Frameless glass doors offer a clean look; a walk-in design with a half-wall and no door eliminates the door entirely, which many older homeowners find easier to manage.
- Flooring and wall material: Textured, slip-resistant tile is strongly preferred on the floor. Larger tiles mean fewer grout lines to clean, but smaller mosaic tiles often provide better grip.
- Drain placement: Linear drains along one edge allow for a single-slope floor and are easier to waterproof correctly. Center drains require a four-way slope.
A good contractor will guide you through these choices, but arriving with preferences helps the planning conversation move faster. See also our article on planning an accessible bathroom renovation for a broader roadmap.
When choosing floor tile, run your hand over a wet sample before committing — the coefficient of friction rating on a product spec sheet doesn't fully replace the feel of the tile underfoot when it's actually wet.
Slip resistance is the single most important safety characteristic of shower flooring, and tactile testing gives you real-world confirmation that a spec sheet number cannot.
Ask your contractor to install blocking (a solid wood backing panel) in the walls during framing, even in spots where you don't plan to put grab bars right away — it costs very little to add at rough-in and makes future bar installation straightforward.
Blocking is nearly impossible to add after tile is set without tearing out the wall. Planning ahead preserves flexibility as needs change over time.
Accessibility Features Worth Prioritizing
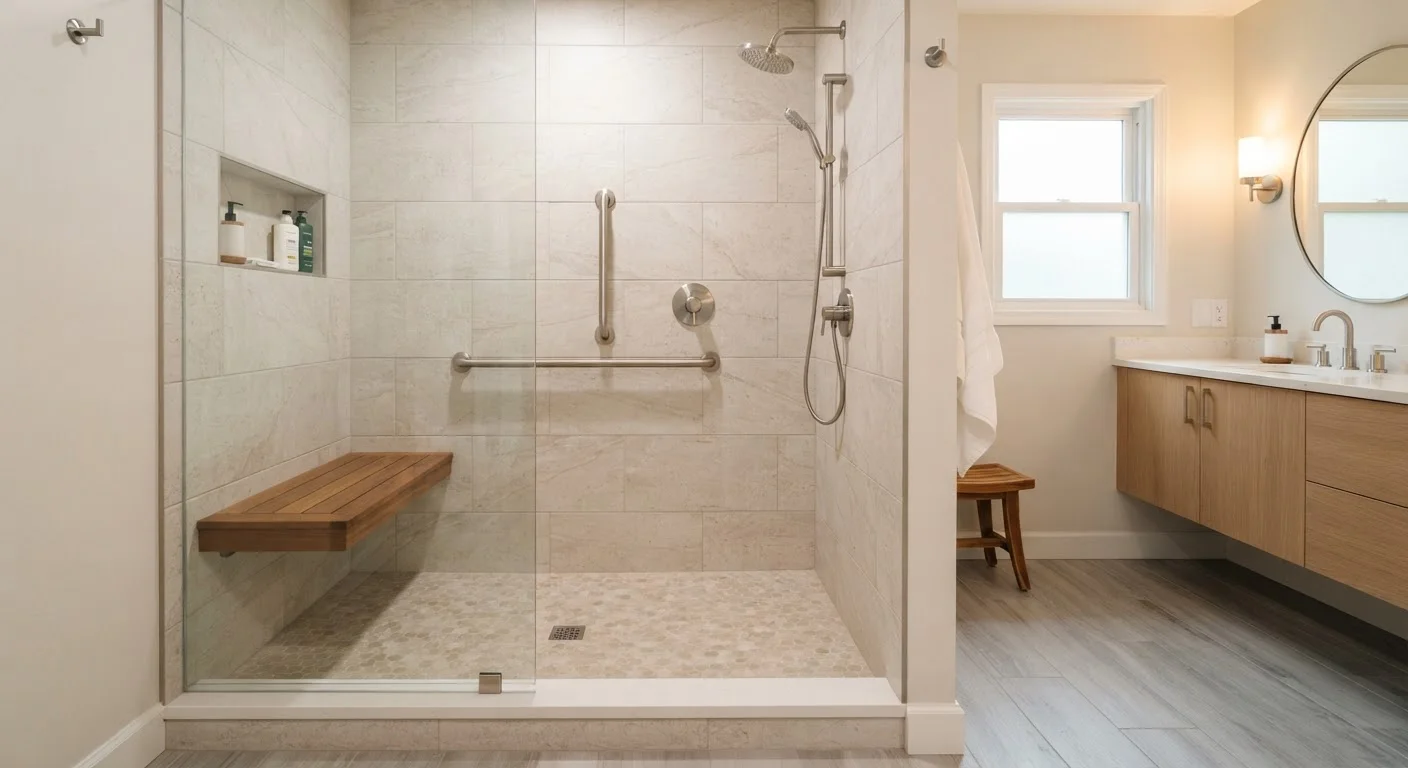
Walk-in showers become significantly safer and more practical with the right built-in features. These are not optional extras — for many homeowners, they are the core reason for the renovation.
- Grab bars
- Properly anchored grab bars near the entry, along the shower wall, and beside any seating provide critical support. They must be mounted into wall studs or blocking — not just drywall. Decide on bar placement before tile goes up so backing can be installed correctly.
- Built-in or fold-down bench
- A seated showering option reduces fatigue and fall risk. Fold-down benches save space in smaller enclosures.
- Handheld showerhead
- A showerhead on a slide bar can be used handheld or fixed at any height, accommodating standing or seated use.
- Thermostatic valve
- This type of valve (a control that maintains a preset water temperature) prevents scalding — an important consideration for anyone with reduced sensation in their skin.
- Low or zero-threshold entry
- A curbless entry (no raised edge at all) is the gold standard for accessibility, though it requires careful waterproofing and floor slope to keep water contained.
What the Installation Process Involves
Walk-in shower installation is not a straightforward weekend DIY project. It involves multiple trades — typically a general contractor or remodeler, a plumber, and sometimes an electrician if heated flooring or new lighting is included. Here is a general sequence of what to expect:
- Assessment and planning: A contractor evaluates subfloor condition, existing drain location, water supply lines, and wall framing. Our companion article on what contractors look at before installing a walk-in shower goes into this assessment in useful detail.
- Demolition: Existing tub, surround, or shower is removed. Subfloor and framing are inspected for water damage before new work begins.
- Plumbing rough-in: Drain and supply lines are repositioned if necessary. This stage requires a licensed plumber and, in most jurisdictions, a permit.
- Waterproofing: A waterproof membrane is applied to walls and floor before tile. This step is critical — skipping or rushing it leads to mold, structural damage, and expensive repairs.
- Tile installation, fixtures, and finishing: Tile, grab bar backing, shower valve, door or enclosure, and accessories are installed and sealed.
Permits Are Required in Most Jurisdictions
Most walk-in shower installations require at least one permit — commonly a plumbing permit and sometimes a building permit. Always confirm which permits apply before work begins. Unpermitted plumbing work can create complications when selling your home or filing a homeowner's insurance claim. A reputable contractor will handle permit applications as part of the job.
Most walk-in shower installations require at least one permit — commonly a plumbing permit and sometimes a building permit. Always ask your contractor which permits are required and verify they are pulled before work begins. Unpermitted plumbing work can create problems when you sell your home or file an insurance claim.
Long-Term Maintenance and Care
A well-installed walk-in shower is low-maintenance compared to a tub-shower combo, but it does require consistent upkeep to stay safe and looking good.
- Seal grout annually: Grout is porous and will absorb moisture and soap residue over time unless sealed. A yearly application of grout sealer protects it from staining and water damage.
- Clean the drain regularly: Hair and soap buildup can clog a drain surprisingly quickly. Clear it monthly using a simple drain tool — avoid harsh chemical drain cleaners, which can damage pipe seals over time.
- Check caulk at seams: The silicone caulk where walls meet the floor or where fixtures meet tile can crack or peel. Inspect it twice a year and re-caulk as needed to prevent water from working behind tile.
- Wipe down glass or surfaces after each use: A quick squeegee or wipe prevents soap scum and hard water buildup, reducing the need for heavy scrubbing.
- Test grab bars periodically: Give them a firm tug every few months to confirm they remain solidly anchored. If any movement is detected, have them re-secured by a professional immediately.
If you want to compare how walk-in shower maintenance stacks up against other bathing options, the complete walk-in tub homeowner's resource covers a parallel set of care considerations for tubs.
This article is intended for general informational purposes only. Renovation requirements, permit rules, and building codes vary by location. Always consult a licensed local contractor and verify applicable regulations before beginning any bathroom renovation project.